

Within the final week’s tutorial, we went via 4 Simple Steps to Seize Lovely Astrophotography Landscapes. This week we observe via with the best way to edit your astrophotographs. Subsequent week I will write the best way to edit twin publicity astrophotography, so keep tuned and subscribe to my e-mail record if you have not already!
The {photograph} we’re modifying right here was shot with the Nikon Z 7 and Sigma 20 mm f/1.4 lens. With ISO 8000, f/1.6, and 25 seconds publicity.
Like I wrote final week, if you happen to expose the image extra, it provides you extra room for modifying in Lightroom. Pulling the shadows is way more difficult while you use excessive ISO settings. So, do not underexpose your pictures.
These settings have been made with my EPIC Preset Assortment, however you may observe alongside and make these modifications by your self. The EPIC Presets makes your workflow quicker with a whole part devoted to nighttime images.
Earlier than & After astrophotography modifying Lightroom CC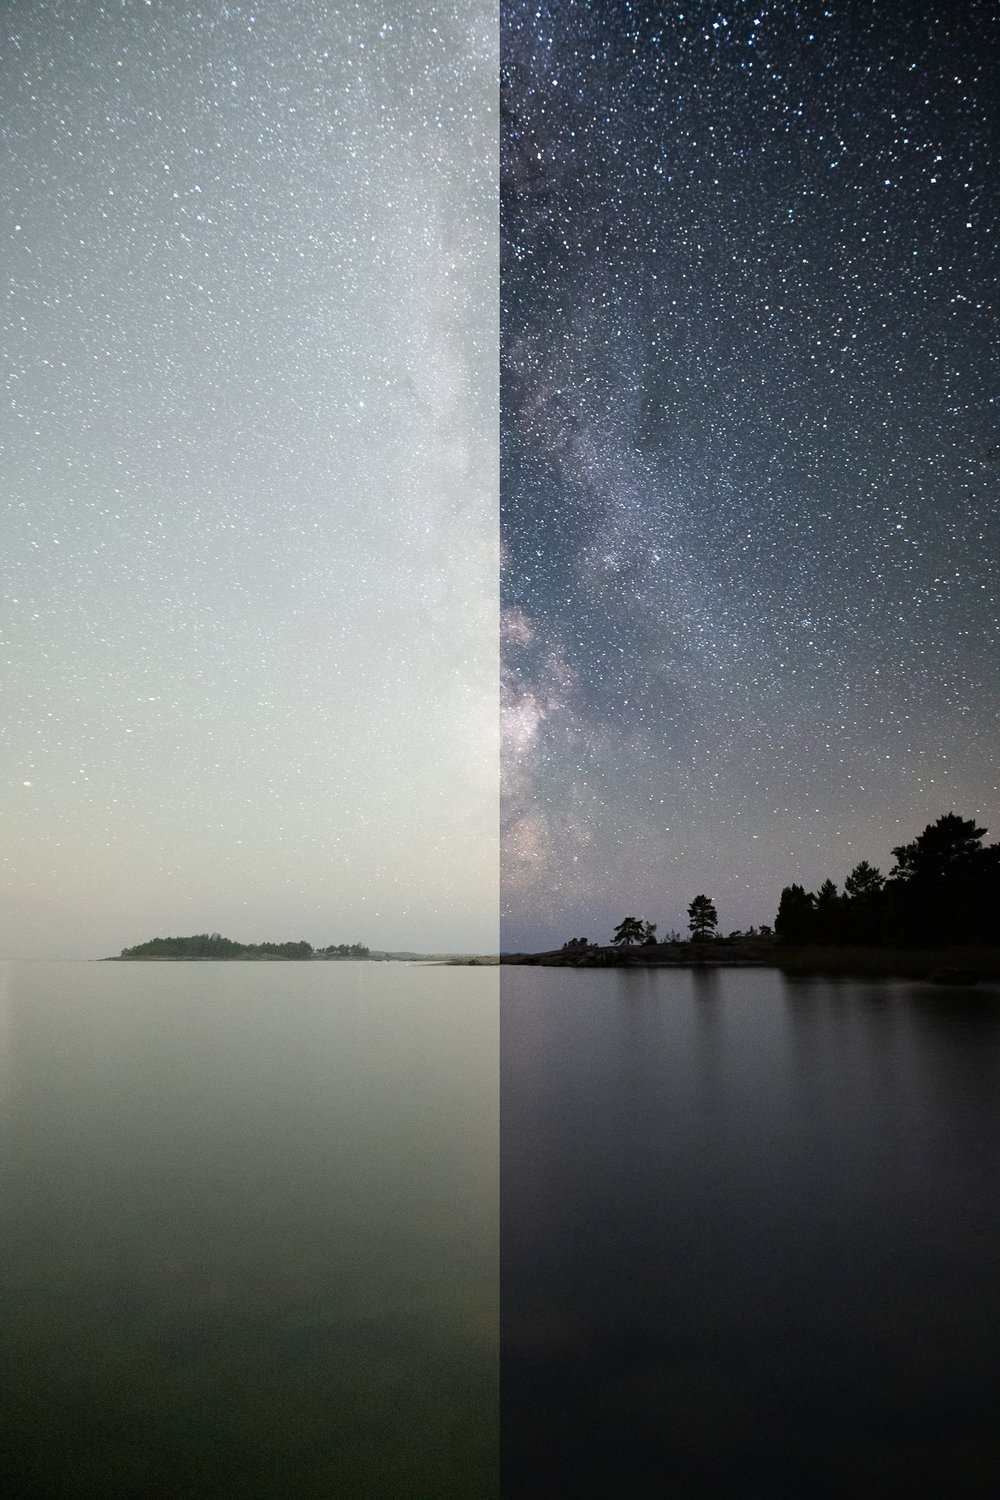
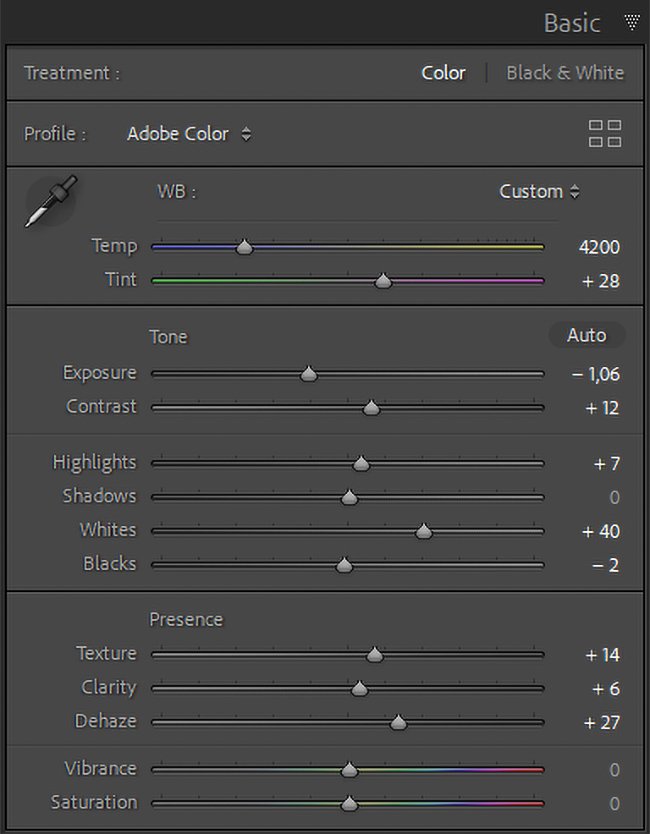
1. Primary Settings
Let’s emphasize the Milky Means and darken the picture to look extra like an evening picture with the essential settings.
Temp 4200
Tint + 28
Publicity – 1,06
Distinction + 12
Highlights + 7
Whites + 40
Texture + 14
Readability + 6
Dehaze + 24
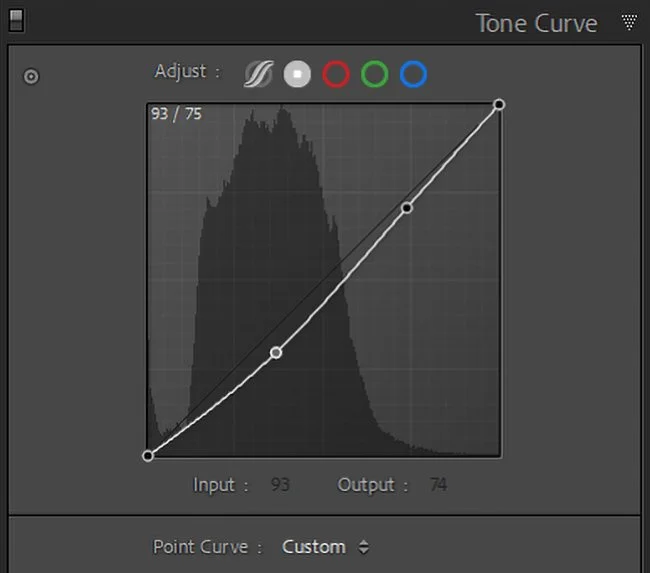
2. Tone Curve
Darken the picture extra with the tone curves. Two factors, prime and backside center within the curves.
Enter 188 – Output 180
Enter 93 – Output 75
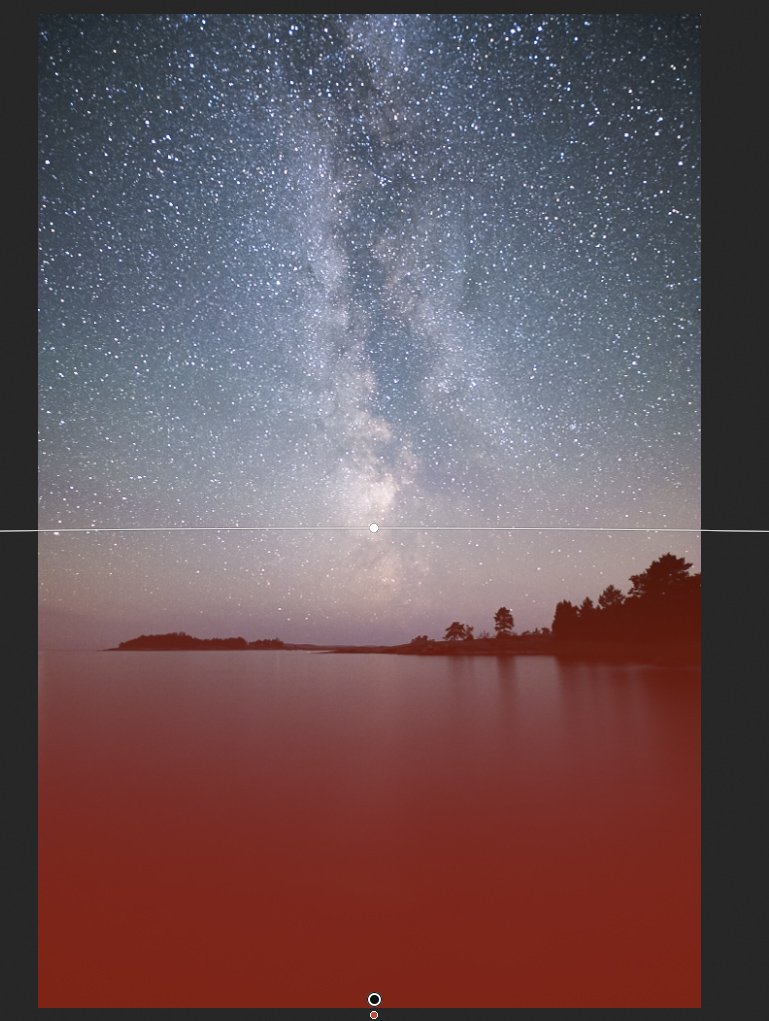
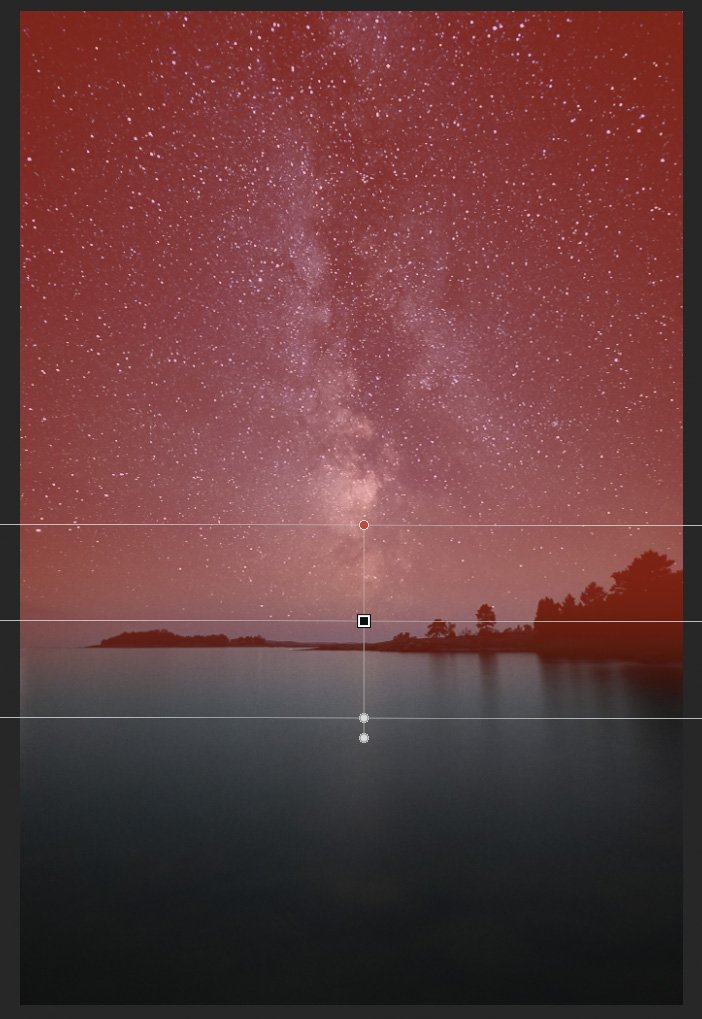
3. Graduated Filters
With the graduated filters, let’s apply mild to the foreground and add distinction and element to the sky. As a result of it is a easy {photograph}, we are able to use two graduated filters. The shortcut for the graduated filter is M.
For those who really feel fancy, you can even use the Choose Sky function, which works fairly effectively for evening pictures more often than not.
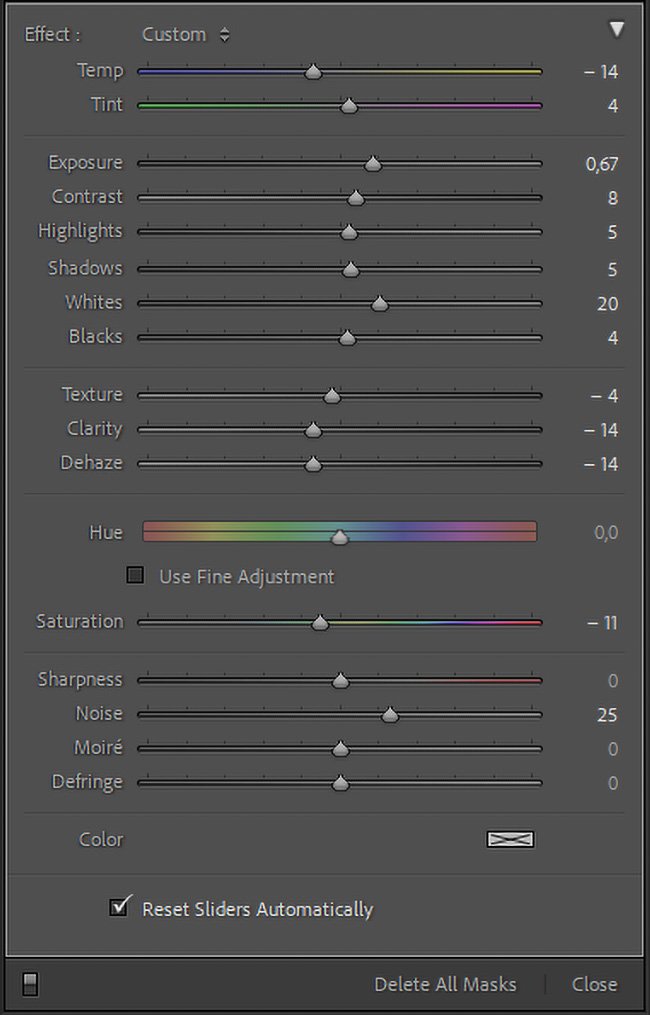
Foreground graduated filter
Place this filter within the backside a part of the body. Utilizing Temp and Tint, we attempt to match the general colours within the picture.
Temp – 14
Tint 4
The next primary settings enhance the foreground brightness.
Publicity 0,67
Distinction 8
Highlights 5
Shadows 5
Whites 20
Blacks 4
For this explicit picture, we do not want extra element within the foreground. To use a smoother look, use the next settings.
Texture – 4
Readability – 14
Dehaze – 14
Lastly, let’s make the saturation decrease and apply a noise discount.
Saturation – 11
Noise 25
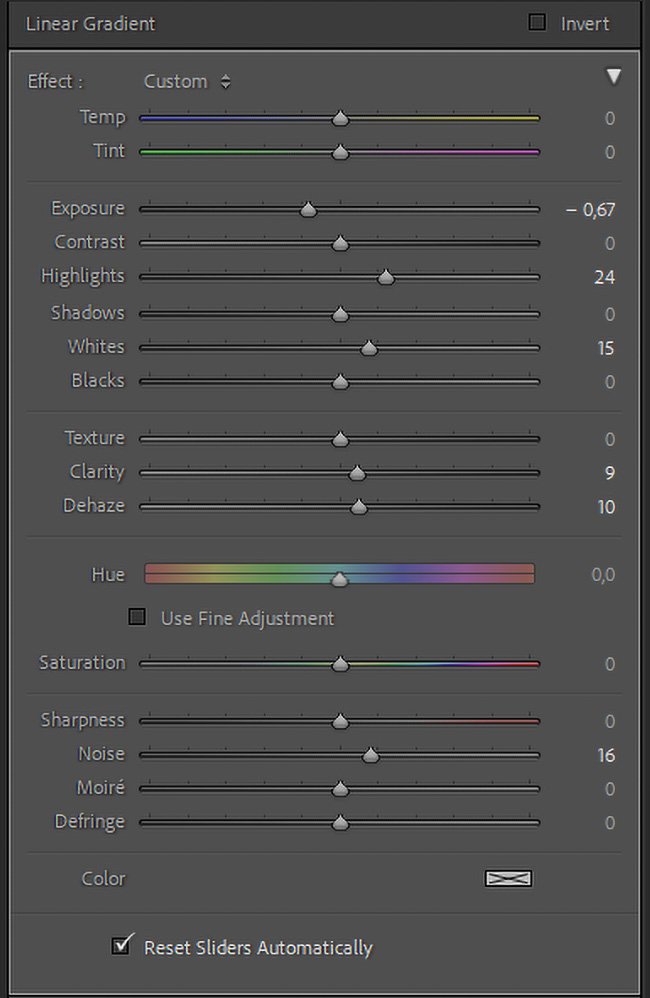
Milky Means graduated filter
Emphasizing the Milky Means is simple. Use the next settings if you do not have to spice up it quite a bit.
Publicity – 0,67
Highlights 24
Whites 15
Readability 9
Dehaze 10
Noise 16
4. Last changes
Apply a lens correction when you have loads of distortion in your astrophotograph. When working with excessive ISO pictures noise discount is crucial. I don’t normally add a lot sharpening for astrophotography as a result of it might create extra noise.
Sharpening
Quantity 50
Radius 1,2
Masking 10
Noise discount
Luminance 15
Element 45
Distinction 15
Put up-Crop Vignetting
Vignetting is one thing I have a tendency so as to add within the last levels of my modifying workflow.
Spotlight Precedence
Quantity – 9
Feather 100
Highlights 100
Grain
By eradicating loads of noise, it’s good so as to add some grain so that you don’t find yourself with {a photograph} that appears overly easy.
Quantity 9
Dimension 10
Roughness 9
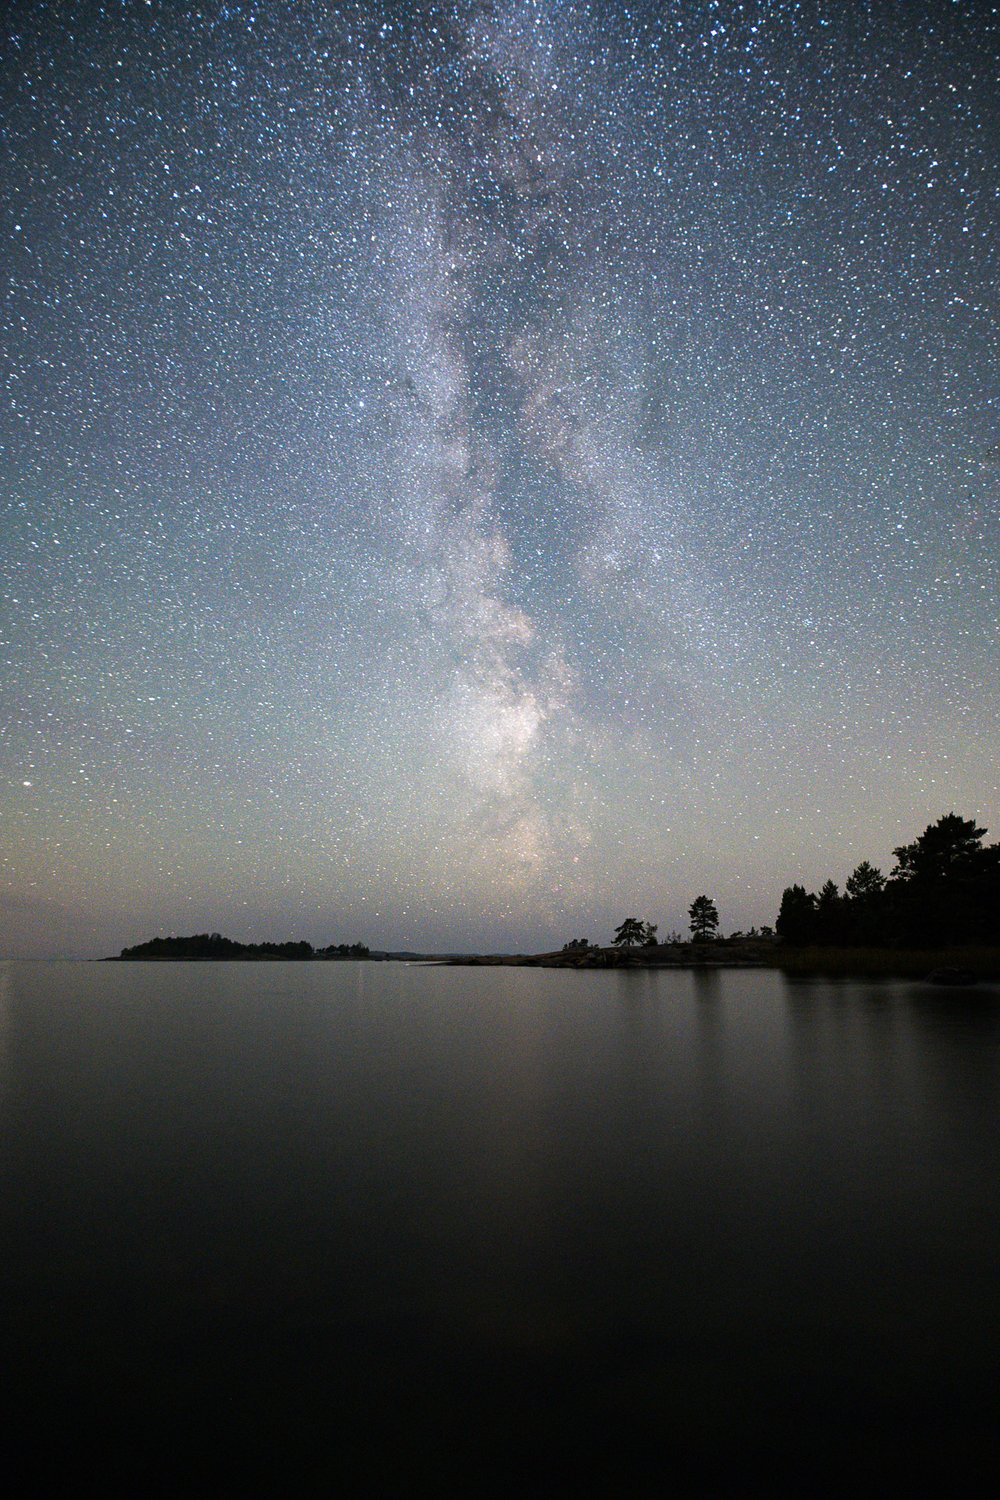
Right here is the ultimate edit.

Beneath are two completely different variations made with the EPIC Preset Assortment.
EPIC – General Coloration: Fantasy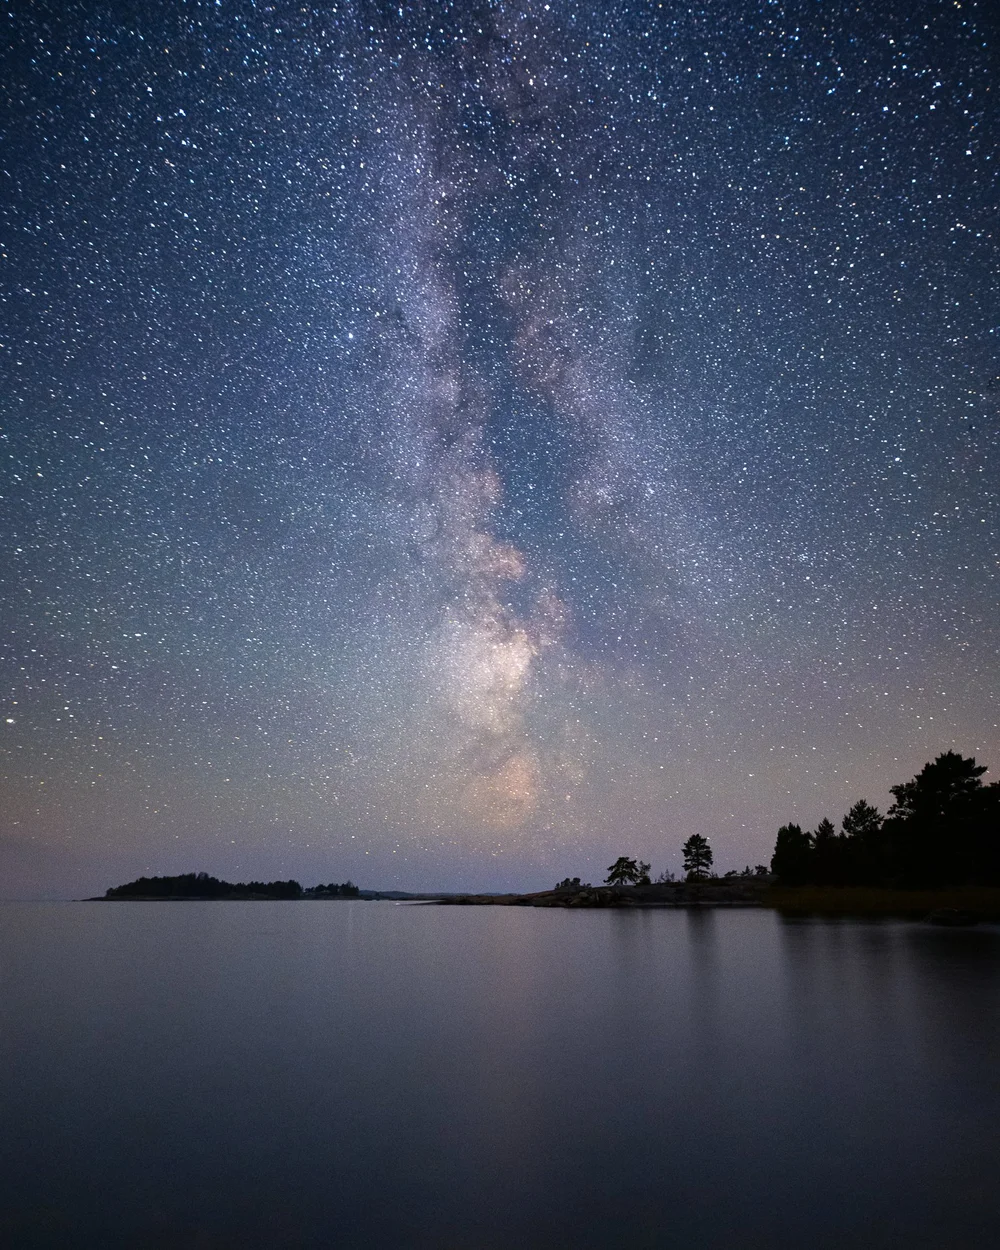
EPIC – Coloration Grading: Teal and Orange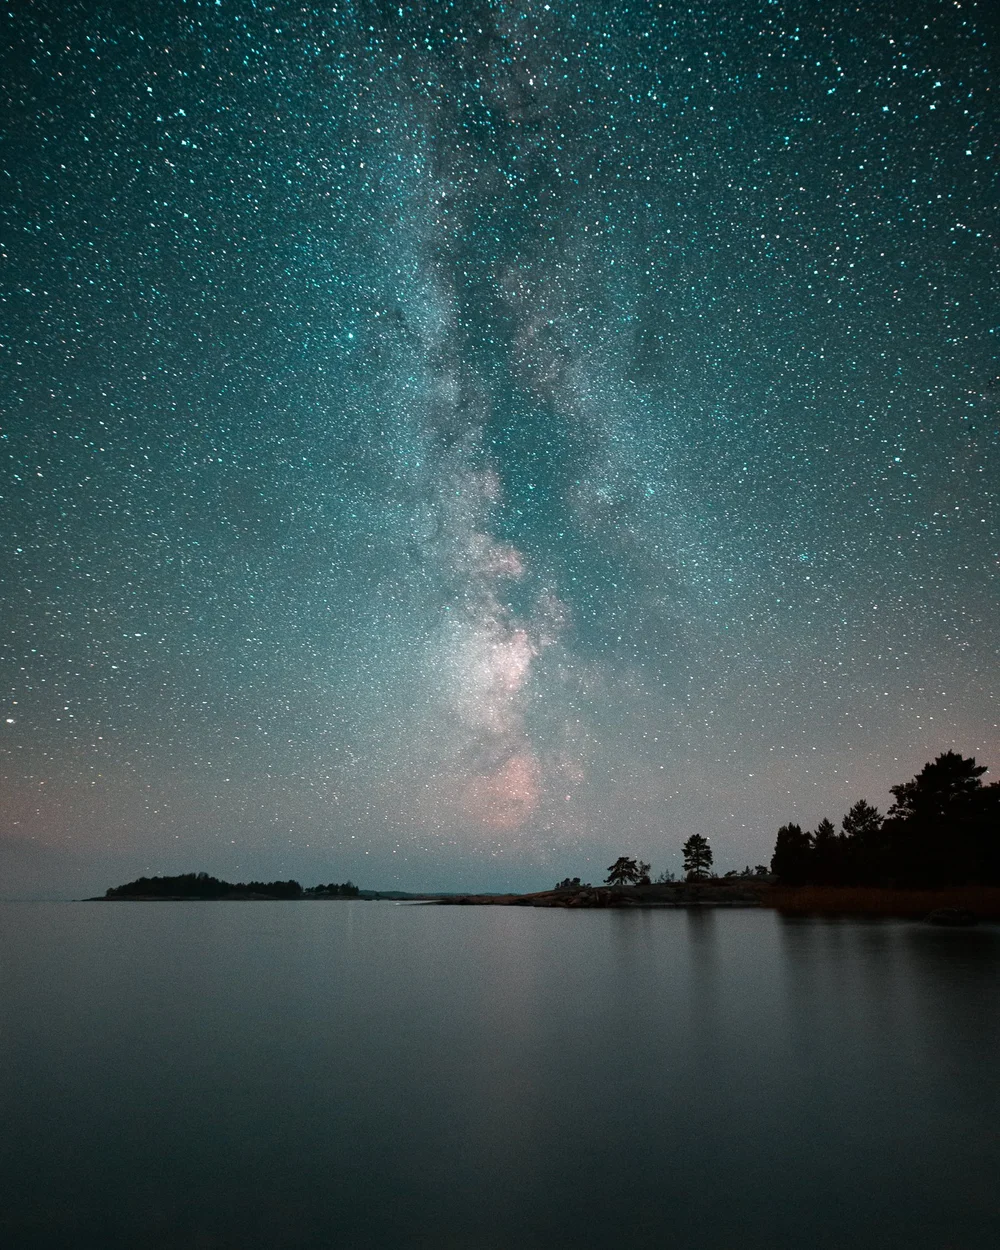
Instruments & tutorials used on this tutorial
Lightroom CC Traditional
EPIC Preset Assortment
Star Pictures Masterclass
Did you discover the tutorial useful? I’d love to listen to from you; what would you wish to see extra right here on my weblog!
Till subsequent time my fellow photographers, take care and carry on creating!
For those who get pleasure from this publish. Subscribe to be the primary to obtain Subscribe
contemporary new tutorials straight to your inbox!
We respect your privateness.
Thanks!